Atomic Design in React: A first year retrospective
Atomic Design in React is an (allegedly) popular way of structuring React projects which is said to offer great scalability. Before 2020 I never worked on a project big enough to need something like this, but as Staffscanner's features grew I felt the need to enforce a more scalable structure. So here's some thoughts on my first year with React and Atomic Design.

How does Atomic Design work?
Atomic Design at its core is fairly simple. It mainly consists of dividing up your components depending on their hierarchy within your app.
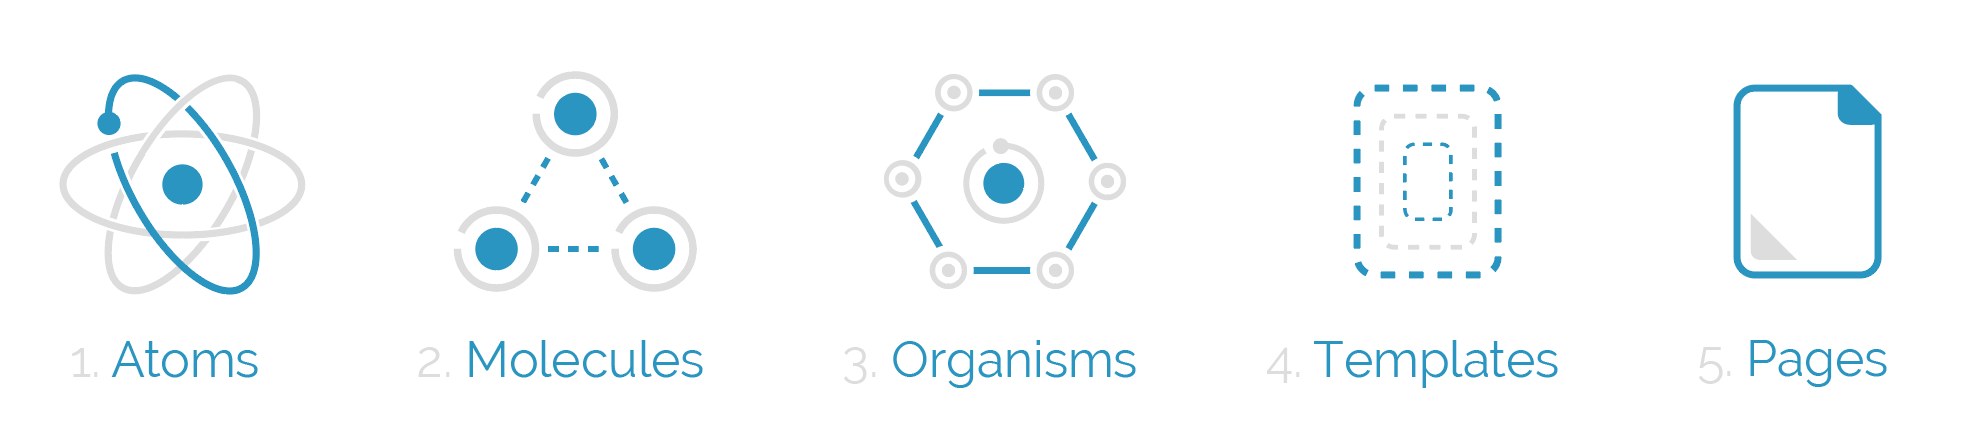
- Atoms are the most reusable parts of your app
- Molecules are often instances of Atoms for specific uses
- Organisms are made up of one or more Molecules
- Templates set contexts and place components where they should be on the page
- Pages pass down components to the templates and fetch data to be displayed
(This is a very simplified explanation of Atomic Design in React. You can find a more thorough explanation at danilowoz/react-atomic-design.)
On the surface, Atomic Design might seem pretty simple. Nevertheless, I found myself somewhat confused while putting it into practice. Not because of its complexity but because certain rules and situations didn't seem to quite fit the model.
Atomic Design in React: The role of templates and pages
While atoms, molecules and organisms are simple concepts to get your head around, templates and pages are a bit more complicated. The way Atomic Design in React envisions templates is as layout-only components that receive organisms and molecules to place them in their correct positions.
I assume it should probably look something like this:
export default function App() {
  return (
    <Template>
      <Template.Element1>A component here</Template.Element1>
      <Template.Element2>A component here</Template.Element2>
      <Template.Element3>A component here</Template.Element3>
    </Template>
  );
}
The problem
While I like the idea of templates existing exclusively to position other components, I found the practice of passing those components as props to be needlessly complex. Don't get me wrong, this practice does make templates much more reusable, but in my situation it seemed to add a lot of unneeded prop drilling and made the hierarchy much more difficult to read.
My solution
After trying the "correct way" for a while I started to realize that many of my pages were simply too different from each other and that I rarely ever reused templates. I was giving myself a lot of overhead where it simply wasn't needed.
So, rather that making templates as reusable as possible, templates essentially became my pages. They import the needed components and place them where they're supposed to be rendered on the page. This then allows me to demote pages to simply be used for Routing, which mirrors Next.js' routing setup which I'm very fond of.
Atomic Design in React: Using pages as routes
If you've ever used Next.js it's very likely you've used its built-in routing functionality at some point. Files inside the pages folder automatically render as routes:
pages/blog/first-post.js→/blog/first-postpages/dashboard/settings/username.js→/dashboard/settings/username
I like this pattern. I think it makes it easy to quickly explore how the app is structured. If I want to know what components are used in blog/first-post, I can just go to the folder that renders the page and drill down to the rendered components.
Even for someone not at all familiar with the codebase, this is easy to understand.
A lot of my pages then simply end up looking like this in case they have sub-routes to render:
// src/pages/posts
export default function App() {
  return (
    <Switch>
      <Route path={`${match.path}/:postId`}>
        {/* The page responsible for rendering a single post */}
        <PostPage />
      </Route>
      <Route path="/">
        {/* The page responsible for rendering a list of all posts */}
        <PostListPage />
      </Route>
     </Switch>
  )
}
And if they are simpler they usually just render a template, maybe with some protection if certain users should not be able to see them.
// src/pages/posts/post
export default function PostPage() {
  return (
    <Protect>
      {/* The template responsible for rendering a single post */}
      <PostTemplate />
    </Protect>
  )
}
I found that leaving this layer as simple as possible then also helped in those few situations where an extra context was needed but I couldn't re-architect a template. It's a safety net that's served me well.
Atomic Design in React: Prop Drilling and Contexts
Atomic design doesn't specifically mention anything about where props should be used or where contexts should be used but I found this to be a crucial decision to keep the application scalable.
The problem
A lot of my data fetching and mutating is handled exclusively by hooks. So I'll have a hook called usePosts() which returns the post data but will also contain methods like doDelete or doEdit. This is great for keeping everything separate and easy to test, but at some point it needs to be imported in a component for the data to be displayed.
Once the hook is imported in a component, that component will be forever dependent on that specific context exiting somewhere higher up in the component tree. It makes code simple to read but could potentially kill the reusability of that component.
My solution
While this is an entirely arbitrary solution, I decided very early on to only use hook and contexts in:
- Templates - Where the contexts are usually set up
- Organisms - Where contexts are usually consumed
Any data that needs to be displayed in molecules is passed down as a prop. This allows molecules to be as reusable as possible while organisms (which are usually page specific) can still enjoy the benefits of using hooks and contexts.
Atomic Design in React: The gap component saved my life
A key rule of Atomic Design in React is to never add margins or paddings to molecules and organisms. This seems silly, but it helps a lot with reusability. Some components might need padding in certain situations, but not in others!
This is a good rule to follow on paper, but in practice it means adding a lot of divs just to have spacing, which pads out code and looks really nasty. What helped a lot in this situation was Tailwind's space class:
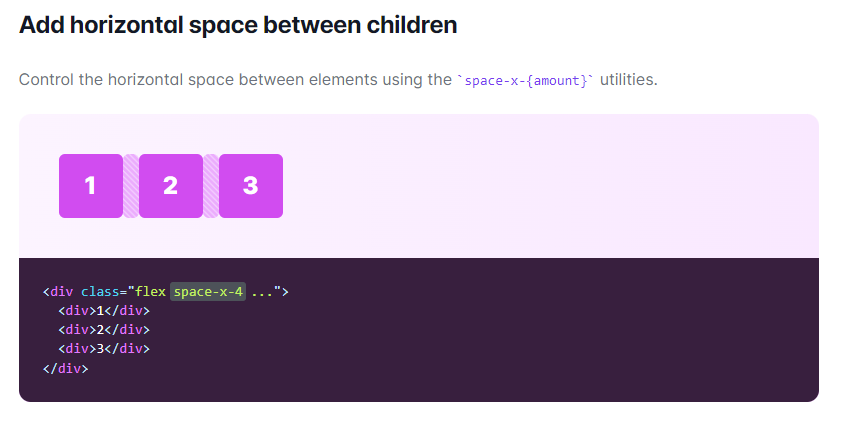
Space works much like the CSS gap property, except it's actually supported by all browsers. Gap doesn't have widespread support among older Apple devices so it might still be a bit before we can use it!
In case you're not using Tailwind or you're not in the mood to get CSS hacks together, I would suggest replicating Ant Design's <Space> component which works much the same but uses props rather than CSS.
Final thoughts about Atomic Design in React
My main reason for using Atomic Design was to make our codebase easier for people with little to no experience in React to easily find their way, and while I didn't end up following it exactly it has definitely worked. Components are clearly separated while still being easy to test and reuse.
I really like how it has a very strong base, but isn't strict enough to stop experimentation and rule-bending. I guess time will tell if my changes are terrible or if they don't end up impacting a lot, but as of now I'm very satisfied with the results.